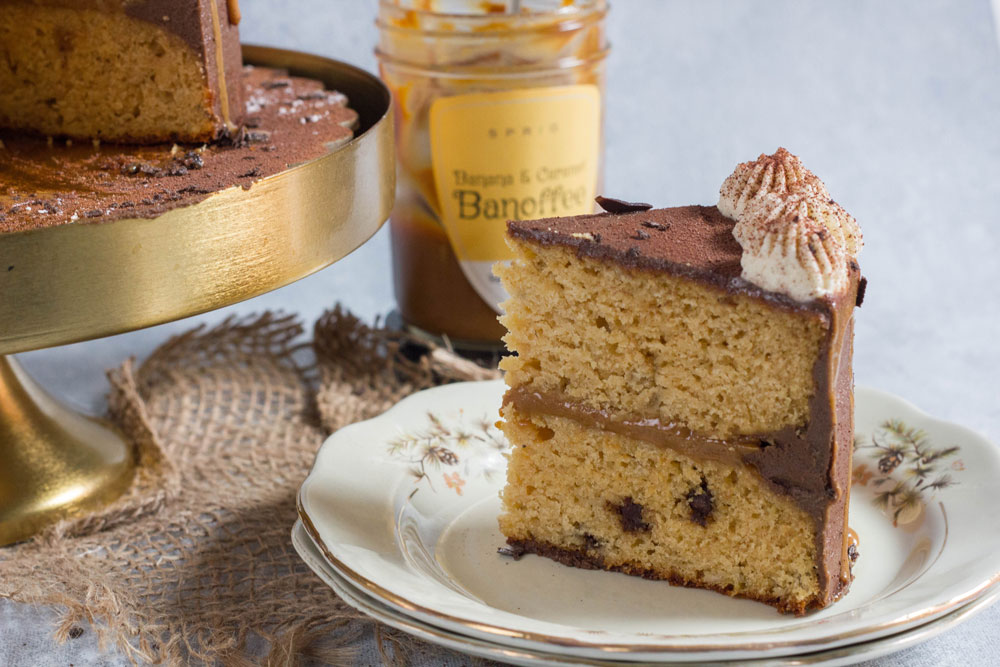
A 2-layered 8-inch banana chocolate chip cake filled with Sprig Gourmet Banoffee sauce and frozen with dark chocolate buttercream frosting. The cake has a banoffee sauce drip, whipped cream topping, garnished with chocolate and banoffee bark.
Ingredients
Banana Chocolate Chip Cake
- 190gm of all-purpose Flour
- 150gm Butter
- 3 Eggs
- 150gm Dark Brown Sugar
- 200gm Mashed Banana
- 2 teaspoons Baking Powder
- 75gm Dark Chocolate Chips
- 60ml Milk
Banoffee Filling
- 125gm Sprig Banoffee
Dark Chocolate Buttercream Frosting
- 100gm Dark Chocolate
- 75gm Butter
- 250-275gm Icing Sugar
Banoffee Sauce Drip
- 75gm Banoffee
- 1-2 tablespoons Water
Whipped Cream Topping
- 125ml Cream
- 2 tablespoons Icing Sugar
- ½ teaspoon Vanilla Extract
Dark Chocolate and Banoffee Bark
- 50gm Dark Chocolate:
- 2-3 tablespoons Banoffee
- Cocoa powder for dusting (optional)
Directions
Banana Chocolate Chip Cake
- Pre-heat the oven to 180o ; grease and line the cake tin with parchment sheet
- In a small bowl, mash the bananas using a fork
- In a bowl, add butter and sugar then beat until light and fluffy
- Add and beat one egg at a time
- Add the mashed banana and milk into the butter mixture
- Sift in the flour and baking powder into the bowl and mix slowly until completely incorporated
- Fold the chocolate chips into the batter
- Divide the batter equally into the two pans, bake for about 40 minutes
- Check with a wooden skewer to see if the cake is completely baked
- Once baked, let the cakes cool on a cooling rack
Dark Chocolate Buttercream Frosting
- Chop the dark chocolate into small chunks, melt in a microwave oven or in a bowl on a pan with simmering water
- Once the chocolate is melted, let it chill until it comes to room temperature
- Cream the butter until pale and fluffy; add the melted chocolate in the bowl of butter
- Add the icing sugar in batches; beat for a couple of minutes until it reaches the required piping consistency
- Add all the frosting into a piping bag
Banoffee Drip
- In a small heavy bottom sauce pan, add the Sprig Gourmet Banoffee; add one tablespoon of water at a time
- Mix thoroughly with a spatula or a whisk
- Check the consistency; if needed runnier add another teaspoon of water
- Don’t make it too runny, you don’t want the sauce to be too runny
Dark Chocolate and Banoffee Bark
- Melt the dark chocolate and spread it thin on a parchment sheet
- Pour 2-3 tablespoons of banoffee drip into a piping bag; cut the tip of the piping bag and drizzle over the melted dark chocolate
- Let it chill for 30 minutes to an hour in the freezer
Whipped Cream Topping
- In a bowl, pour the cream and start whipping with a stand mixer or a hand mixer until soft peaks are formed
- Add the icing sugar and vanilla in the cream
- Whip again until stiff peaks are formed
- In a piping bag with open star tip, add the whipping cream; chill it in the refrigerator until needed
Assembling the Cake
- Using a bread knife or a cake leveler, trim the tops and level the cake so that it is uniform in size
- On a cake stand or a cake board add a dollop of buttercream, this will help you keep the cake layers in place while frosting
- Place the bottom layer on the dollop of frosting; pipe around the edges of the cake so as to form sort of a dam around the cake
- Scoop in dollops of Sprig Gourmet Banoffee on the bottom layer of the cake in between the dark chocolate frosting ring
- Using an offset spatula, smoothen the banoffee sauce filling on the cake
- Place the second layer of cake on top of this
- Using a palette knife, do a crumb coat around the cake; let the cake chill for 15-30 minutes
- Pipe the frosting around the cake; using a palette knife or a cake scraper smoothen it around the cake
- Snip the tip of the piping bag with banoffee drip, slowly drizzle on the edge of the cake; this forms the drip on the cake
- Pipe small blobs with whipping cream around the edges of the cake as well
- Take out the chocolate bark from the fridge, cut it up into random shapes using a sharp knife
- Poke them on to the top of the cake
- Sprinkle some of the cocoa powder on top
Recipe and image courtesy of www.lilcupcakemonkey.com

